Knitting Tension (Gauge) for the Terrified: Part 2
Last month I blogged about the issue of tension/gauge and why it is important to check your tension. Hopefully I've managed to convince you of the benefits of doing a tension swatch for successful knitting. As promised I am now going to show you how to knit your swatch, measure the tension of it and, more importantly, what to do if yours doesn't match what the pattern is asking for.
How to check your knitting tension (gauge) for a project
The pattern you use will state what tension/gauge the knitted item was made up to, along with what size needles the designer used to achieve that tension. This is conventionally expressed as the number of stitches and rows that make up a 10cm/4in square. Note: it will also state which stitch pattern was used - this may often be stocking (stockinette) stitch, but for designs with a stitch pattern it will most often be in that particular stitch pattern, so you need to ensure you knit your swatch in the relevant stitch.
Tips for Knitting Your Swatch
Many people will approach the swatch by only knitting the 10cm square stated, for example if the required tension is 22 stitches and 30 rows, they may cast on 22 stitches and work the 30 rows. However this will be too scant to achieve a true measure of the tension/gauge - stitches along the edges will always be a little tighter than the rest, so you need to measure inside the edges to achieve an accurate measure of tension/gauge. You'll need to make a swatch at least a few stitches larger than this, and it's also helpful to work a garter stitch border around your swatch area - this will encourage your swatch lie flatter to aid accurate measurement.
Size matters.....
With this in mind it's recommended to aim for about a 15cm x 15cm square (6 in x 6 in) and to achieve this just multiply the number of stitches and rows by 1.5.Applying this to our example, you'd cast on 22 x 1.5 = 33 stitches and work 30 x 1.5 = 45 rows.You may wish to round this up or down if desired for convenience. For example if you're working a patterned swatch you will want to have a number that works with the pattern repeat plus allow 4 stitches for the garter stitch border. For example if your stitch pattern repeat is in multiples of 7 +1, you need to divide the number of stitches by 7, then add the +1, plus add 4 stitches for your garter edges. For example:33 divided by 7 = 28 with 5 left over - what luck as you need an additional 5 stitches for the +1 of yourrepeat plus the 4 garter edge stitches (2 on either side).So now you know how many stitches to cast on, using the size needles recommended in the pattern go ahead and knit up your swatch and then cast off.
To Block or Not To Block
There is often debate about whether to block your swatch or not before measuring the tension, and indeed some patterns will mention this specifically e.g. tension after blocking. If this is the case you should definitely do it, but otherwise it's up to you whether to block or not. Also, if you are measuring tension for making your own design then doing so after blocking is a must.
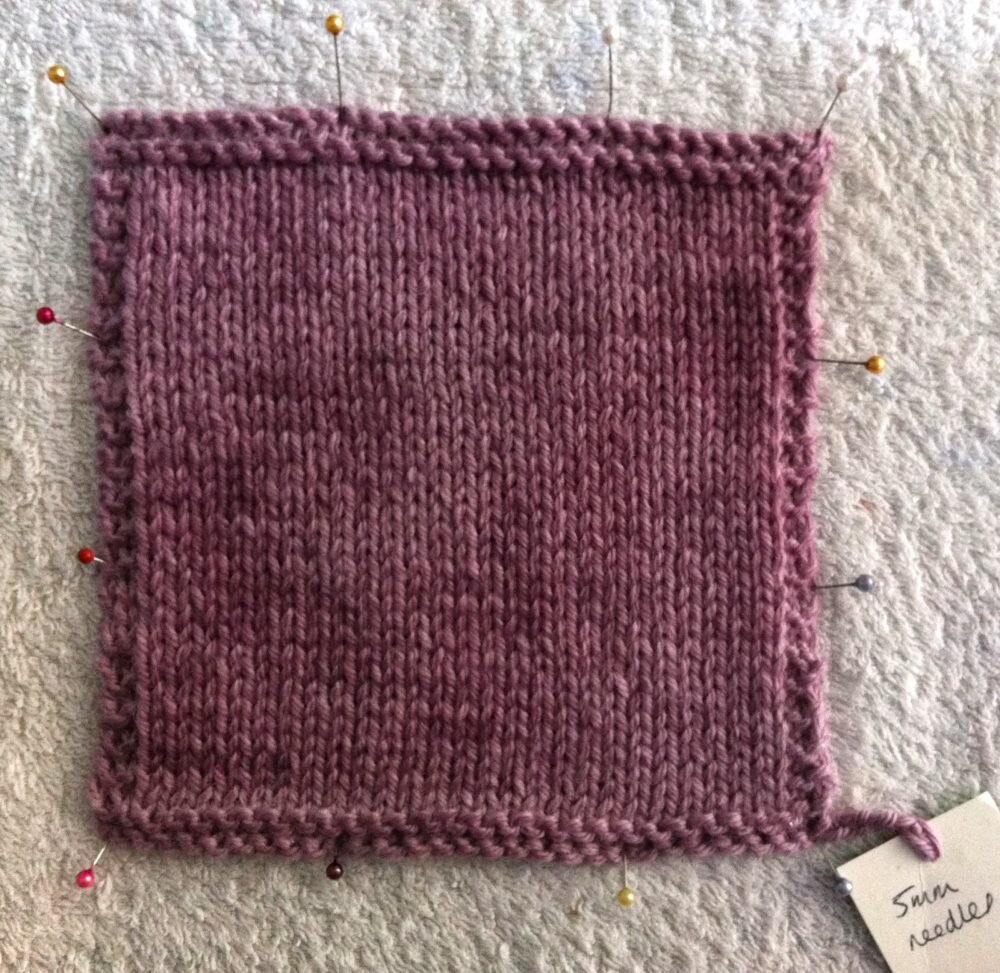
If you do block, and I recommend you do, you need to ensure you aren't stretching your swatch as in most cases you're not seeking to block it aggressively, just to help the stitches 'settle in' and the fabric to relax. To achieve this simply pin your swatch right side up (I use my ironing board with a towel over for this), gently easing it so it is flat and in shape, and ensure you're not stretching it as this will distort the stitches. Pin the corners and along the edges, ensuring the edges are all straight. I then spray lightly with water using a plant spray, pat this down into the surface and then leave it to dry completely before unpinning it - leaving it overnight will usually do the trick.
Measuring Your Tension
The best tool to use is a short plastic ruler as tape measures are more ‘wriggly’ and prone to stretch over time. You'll also need some pins, and to ensure you have good lighting – oh and don’t forget your specs if needed. Place your swatch onto a flat surface – your knee or the arm of the sofa just isn’t going to cut it (yes, I know all your tricks).
Counting Stitches


Place your ruler horizontally across the swatch, ensuring your ruler lines up with a row of stitches and doesn’t lie diagonally across the knitting. Making sure your 10cm/4 in falls well within the edges, place a pin at the 0 and the 10cm/4in point. Put your ruler to one side and now count the number of stitches (which look like ‘v’s) between each pin. Use a knitting needle to help you keep count.
Counting Rows
Follow the same process as above, but this time lay your ruler vertically across the swatch, making sure it lines up straight with a line of stitches.


Matching the Tension/Gauge
If you are very lucky your number of stitches and rows will match that stated. If it doesn't, don't be disheartened - there is nothing wrong with your knitting, as we all knit to our own unique tension. You'll just need to make some adjustment to the needle size stated so you can achieve the required tension:
• If you have too few stitches to those required this means your tension is looser than the designer's and you need to go down a needle size or two to tighten it.
• Likewise, if you have too many stitches your tension is tighter than the designer's and you need to go up a needle size or two.
If you are only 1-2 stitches out, try adjusting by 1 needle size up/down, if you are more than 2 out, try 2 sizes up/down - then you need to make another swatch with the new needles.
Knitting tension is not an exact science but rather an art, so you may find you are not able to match the number of stitches AND rows exactly. If this happens, don't panic - again there is nothing wrong with your ability to knit. If this is the case opt for matching the number of stitches, as it is easy enough to make any small adjustments to the length if your row tension varies slightly.
Another thing to emphasise here, is having gone to all that trouble to match the tension/gauge, make sure you use those same needles to knit up your item as a different type and/or material of needle will handle differently and affect your knitting tension. I speak from experience here as on one occasion, having successfully swatched for a project using 5mm bamboo straight needles, I then proceeded to knit my garment with a new 5mm metal circular needle – needless to say my project did not go well as I knitted much tighter on the new needles and my garment came out too small to wear.